Have questions?
Let us answer them...
Your questions can be the same of many others, let us guide you to your relatable doubts..
- Home
- FAQ
- Frequently asked questions by Doctors
- Attachment Procedure For Aligner Case
Attachment Procedure For Aligner Case
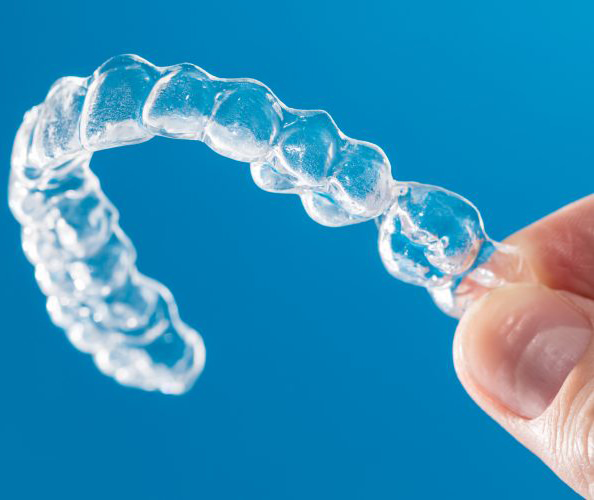
Attachments are tiny tooth coloured “bumps” that are bonded to the teeth using dental composites. They will be placed at precise locations to allow the aligners to shift the teeth as they are guiding them to their new locations. Buttons are small auxiliaries that are used to anchor rubber bands.
Little buttons known as attachments are sometimes necessary part of aligner. They enable the aligners, which sometimes cannot accomplish alignment changes on their own because of the size, shape or angle of specific tooth, to move with a little extra force to shift teeth into their proper location.
Not every case requires attachments – some simpler cases do not require them for the aligners to move your teeth properly. During your consultation for aligner, orthodontist will decide your treatment plan and determine whether you will need attachments. Most cases require attachments to be effective.
Aligner attachments have different shapes that help to increase the retention and gives the better control of certain tooth movements whenever needed. Attachments made up of composite resin bonded to the tooth surface.
The new attachment protocol allows for attachment to be passive or active. Passive attachment are for aligner retention and anchorage for intrusion.
Active attachment are used for rotation of rounded teeth, extrusion and root correction. Currently align technology has three types of attachments for use – the ellipsoid, rectangular and the bevelled attachments.
Ellipsoid attachments are placed horizontally for the anterior tooth extrusion.
They are 1mm in thickness and placed between the cervical and middle third of tooth.
Vertical rectangular attachment are used for rotation of canine and premolars.
In addition this attachment are used for root control on teeth adjacent to extraction spaces, foe premolar extraction cases, the default is placement of two rectangular attachment distal to the space and one mesial to the extraction space. These attachments are 1mm thick, 2mm wide and either 3, 4 or 5mm long.
Usually all attachment for aligner cases are placed prior to starting the aligner treatment. Attachment template is provided before the first stage of aligner. First template is used to give attachment and then subsequent aligners are delivered.
Few cases might need attachment during aligner treatment in such case one more attachment template is provided to place the attachment.
Some changes to the smile are difficult to accomplish with just the aligner alone. For instance, if a tooth needs to be rotated or brought up a bit more above the gum line, or if a tooth is shaped a certain way or aligned a certain way, it can be difficult for the aligner to apply the right pressure to move it properly. Attachment can work to provide an anchor point to help direct the force of the aligner more perfectly and predictability.
Buttons are used when the orthodontist decide that certain movements cannot be achieved with the aligners alone. It is important to remember that the goal of orthodontic treatment isn’t just a straight smile, but a properly functioning bite a well. Elastics help to guide the bite to ensure the upper and lower teeth line up properly.
Placement of the buttons and attachments is simple process. A template is created that marks perfectly where they should be placed on the teeth.
Then, the teeth acquiring them will be cleaned and prepared to allow the material to bond properly. The bonding material put in the marked spots and a light will be used to set the composite material. It’s quick and simple process.
Once treatment is over we just polish them off the teeth.
Composite resins are used for attachment placement. Composite resins are divided into the various categories based on their filler content such as nanofilled, microfilled, hybrid, packable and flowable.
Flowable composite resins are group of convential composite resins, whose filler content is 37-53% compared to conventional composite resin with the filler content of 50-70%. This decrease in filler content has decreased the viscocity of this group of restorative material significantly, so that they can be injected with the use of syringe into aeas in the oral cavity with difficult access.
Macro filler type of composite have the good physical properties and it has good radio opacity but less polishing property with poor wear resistance. Micro filler are the hybrid composite which has more radio opacity property, high polishing property, and it has less polymerization shrinkage. Homogenic micro filler composite has the good polishing property, less wear resistance, less water absorption, less radio opacity, and has less polymerization shrinkage. Inhomogenic microfiller composite has the more polishabilty and it has the good aesthetic property and less physical property.
Flowable composite has some good properties high wettability of tooth surface ensuring penetration into every irregularity, ability to form layers of minimum thickness, so improving or eliminating air inclusion or entrapment, high flexibility so less likely to be displaced in strass concentration areas. But it has some disadvantages like high curing shrinkage due to lower filler load and weaker mechanical properties than other composite.
So we prefer the 3M Unitek Transbond XT and 3M Unitek Transbond plus light cure adhesive orthodontic material to place the attachment.
Any operative procedure necessitates the need for adequate control cover the operating field. It is imperative that there should be proper moisture control, good accessibility and visibility as well as proper room for instrumentation around the working area. Such a field is necessary for easy manipulation and placement of restorative materials. Isolating the working area includes isolation from moisture like saliva, blood and isolation from the soft tissues like lips, cheeks, gingiva and tongue.
Goals of isolation is moisture control, retraction and access and harm prevention.
Isolation from moisture
A) Direct methods
1. Cotton rolls and absorbent wafers
2. Evacuator system & saliva ejector
3. Cheek retractor
B) Indirect methods
1. Comfortable position of the patient.
Cotton rolls isolation requires placing cotton rolls along the buccal mucosa, especially over the parotid gland ducts for maxillary teeth. For the lower jaw, the cotton rolls are placed in the buccal vestibule and the floor of the mouth (between the lower buccal mucosa and underneath and /or between the tongues. dental suction devices absorb a large amount of air and saliva into them over a short period of time. They are commonly used during dental cleanings, oral surgeries, and cosmetic treatments to keep patient’s teeth and mouth dry while the dentist is completing the treatment.
Cheek retractor serves two purposes: it pulls tissue away to access an area that needs dental work, and it keep tissue in a retracted position during procedure.
For this reason, among the dental composite materials tested and recommended by align technologies for use with aligner is tetric Evocream from ivoclar vivadent, an aesthetic, universal Nanohybrid composite indicated for anterior and posterior restorations and for use in placing orthodontic attachments.
Absolutely not. We can use any type of composite for attachment procedure.
• Different bonding protocols have been suggested for insertion of attachments. Low viscous composite and high viscous composite, or a combination of them can be used to fill each attachment reservoir inside the attachment template. Also, a perforation can be created in the reservoir to drain the excess composite producing attachments with high viscous composite via a two-phase procedure would result in minimum excess composite and is the most precise protocol. The protocol with high viscous composite without drainage will produce the less perfect attachments. Also, the claimed that perforation are only beneficial for use of flowable composites
. • Consistency and viscosity of composites can affect the position and shape of attachments, which are essential for attachment efficacy and aligner fitness. It is important to effectively feel the reservoirs of the template during the bonding procedure. Narrow space can be finely filled with flowable composite although material molding is easier with packable composite. Flowable resin, orthodontic composite, and dental restorative composite have been compared for production of attachment. It was concluded that different composites do not affect the volume and shape of attachment and all of them are applicable for the fabrication of attachment
• As compared the translucency, hardness, and stain resistance of restorative and orthodontic composite for attachment production. They observed that both of them would undergo staining over time. Also, orthodontic composite showed greater or similar hardness in comparison with the restorative composite. Thus generally orthodontic adhesive as well as other composite can be utilized for attachment fabrication.
• In addition to precise bonding, it is essential to maintain the integrity and shape of the attachment during the treatment course. As compared the surface wear of Nanofilled and micro hybrid composites used for attachment during 6 months. None of them showed alteration in shape, however. Micro hybrid composite exhibited greater changes in the surface.
• Light must be of proper intensity.
• Divide total curing time into 2 increments.
• Place light director as close to attachment template base as possible for 1-2 seconds – then physically touch the attachment template to reduce divergent photon release.
• Be sure light maintains intensity throughout entire curing during treatment
• Adequate cure time – Never cure for less than 6 seconds per attachment process.
*Remember 10,000 units of energy*
Eg. 1,000mw2= 10 seconds total cure time
500mw2= 20 seconds total cure time
Attachments are tiny tooth coloured bumps that are bonded to the teeth using dental composite. They will be placed at proper locations to allow the aligners to shift the teeth as they are guiding them to their proper locations.
First remove the attachment template, and while removing attachment template pull the attachment template horizontally and then apply the force vertically to remove the attachment template.
After removing the attachment template examine that which attachment is break after that clean that area properly with tungsten carbide bur and then isolate the tooth, apply etchant acid etch the surface for 30 seconds. Rinse thoroughly and dry. Apply one coat of resin bonding and lightly dry with air. And then placed the resin material and cure it.
An attachment might come off your tooth. If this happens, appoint the patient quickly without delay so that can replace it. This is important because attachments are key part of your treatment. They help your aligner move your teeth into the desired position.
When patient come to the clinic first check attachment template fit properly or not. And check the areas where attachment is break then clean that area with bur and if the template is fit properly then isolate that area apply the etchant then rinse and dry it. Apply the resin bonding agent cure it and place the composite material and cure it.
If the attachment template is not fitted properly then use the previous set of aligner as the attachment template.
If attachment template is not fit properly then we can use the pervious set of aligner as the attachment template like if the patient is on the 6th stage of aligner we can use the 6th set of aligner as the attachment template.
Dispense etching agent onto mixing pad. Etchant May be liquid or gel. Isolate the teeth for etching. With the cotton brush, dab the etching agent onto the whole field to be bonded. . Allow 30 seconds for etching (teeth.) Avoid placing etching agent on soft tissue.
Rinse each tooth with water spray for 10 seconds (20 sec. for gel etch) to stop etching process and clean demineralized particles. A thorough rinsing on each tooth is complicated. Reisolate and dry teeth thoroughly. The etched area should appear frosty white. If not, re-etch for an extra 20 seconds.
The dentin bonding agents are di or multifunctional organic molecules that contain reactive groups which interact with dentin and the monomer of the restorative resin.
Ivoclar Tetric N-bond universal & 3M Unitek Transbond XT is most suitable primer for aligner attachment procedure.
Tetric N-Bond universal is a single component, light-curing adhesive for direct and indirect bonding procedure that features compatibility with all etching techniques. Tetric N-bond universal showed high bond strength on wet / over-dried dentin.
Composition
Tetric N- bond universal composed of methacrylates, ethanol, highly dispersed silicon dioxide, initiators and stabilizers.
3M Unitek Transbond XT The viscocity of Transbond XT adhesive was made to prevent adhesive run on and bracket skating that saves you money and reduces adhesive waste. 3M Unitek’s adhesive filled capsules and dispensing gun also provide for simple application, elevate control and convenience. A syringe delivery system is also available.
Best of all, the Transbond XT adhesive’s quick cure provides for immediate arch wise tie-in so your patients and staff can experience shorter bonding appointments.
Features
Requires only a minimum uniform film on each tooth
Serves as wetting agent
Preloaded and syringes or capsule means no wasted materials.
Excellent handling properties.
We can use the burs like composite finishing bur, tungsten carbide bur, diamond burs and burs with rubber tips and disc are also used to remove the extra composite after placing attachments.
Tungsten carbide burs are highly efficient cutters of metal structures it gives smooth operation and it is very resistant to breakage.it removes the bulk of composite and clean the tooth surface easily.
Dental diamond finishing burs are used for putting the final touches on dental restorations weather they are directly placed composite or indirect crowns or bridges. Used at chair side & in laboratory, these precise burs are available in a variety of shapes, so be sure to find a bur style you are comfortable working with in order to achieve the natural surface of tooth.
Rubber tips- These are used to remove the grooves that the bur and the disk leave. They have two important functions: when they are used firmly, a smooth abrasion results on the composite surface, and when they are used smoothly, they are able to prepolish. The finishing stage is improved with this of instrument. The correct speeds are 10,000rpm for finishing and 5,000rpm for polishing.
Disc – can be used for the contouring of all tooth surfaces as well as bulk reduction of excess material. Disc will help contour and finish curved surfaces such as labial proximal line angles. Lingual marginal ridges, cervical areas, incisal edges, plus finishing and polishing of labial surfaces. They are also excellent for recon touring and finishing of posterior marginal ridge areas, lingual and buccal surfaces.
Burs with the rubber tips are best way to remove the extra composite after placing attachment. Tungsten carbide burs are three times stiffer than steel so carbide bur cut and chip away the tooth structure. So at the time of finishing it can cut the tooth surface.
Diamond burs grind the tooth surface and one of the drawbacks of diamond burs is that they are not ideal for shaping materials such as metals as they are prone to dulling themselves in the procedure as well as overheating.
Disc allow us to perform finishing with more precision and safety compared to diamond and burs. Most disc use the abrasive agent as aluminium oxide or silicon carbide on a plastic backing a few diamonds disc are also available. Area of operation is restricted so one has to go back to the finishing burs in areas which cannot be finished by the discs.
The rubber tips has the low cutting efficiency than all the polishing burs and disc and and rubber tips gives the smooth surface and proper finishing to the tooth surface. The correct speed are 10,000rpm for finishing and 5,000rpm for polishing. Hence the rubber tips are more suitable to remove extra composite after placing attachment.


